Module 2
2. Nurseries and Propagation
This module provides details on : major components of nursery establishment, It also contains guidelines on seed collection, different methods of raising seedlings, and other ways to propagate plants. Fruit-tree grafting techniques are explained, as well as the function of nitrogen-fixing organisms and mycorrhizae. Same principles of nursery management are outlined.
Establishing a Nursery
Before going ahead with nursery plans, a thorough economic analysis is suggested since a good nursery can be an expensive undertaking. In many situations, commercial seedlings are the best and cheapest source of quality planting material.
Selecting the Site
The nursery site is important to ensure efficient production of good-quality plants and easy nursery management. The following factors should be considered:
- Water: Locate the nursery next to a source of water that will be adequate throughout the year, for example, a river, spring, swamp, pond, dam, or perennial well.
- Soil: A good source of sandy loam or loamy soil, preferably forest topsoil, should be as close as possible to the site to reduce transport costs. This is particularly important if a large number of potted seedlings will be produced. If only heavy soils (for example, clays) are available, there should also be an easily accessible supply of sand for making suitable potting mixtures.
- Topography: The site should be relatively flat with a 1-2% slope. The gradual slope allows for runoff, preventing waterlogging and erosion. In hilly areas, nurseries must be built on terraces.
- Microclimate: The site should not be exposed to drying winds, such as those prevailing on hilltops, or to flooding or severe frost, that can occur in valley bottoms. The site should receive sunlight for the major part of the day.
- Materials: Easy access to supplies (manure, chemical fertilizers, compost, polybags, pesticides, etc.) and materials for building fences, shadehouses, sheds, and compost bins, helps reduce operating costs.
- Location: To minimize transportation time and cost, the nursery should be located as closely as possible to the planting area.
- Access: The site should be close to a good road so that the nursery will be accessible throughout the year.
- Ownership: Identify who owns the land on which the nursery is to be established. A written agreement giving the right to use the land and access to the water should be obtained. Also, the duration of the agreement should be specific to avoid conflicts in following years.
- Labor: There should be enough local labor available for nursery construction and, from time to time, for soil transportation, potting, and weeding.
- Size: This is determined mainly by the number of plants to be produced, the time they will spend in the nursery, and their density in the beds. Other factors include the need for roads, paths, buildings, fences, and windbreaks. (See next section for details.)
Determining Nursery Size
Calculation of nursery size is based principally on the expected demand for seedlings and the main plant growing area required. It is also important to remember overlapping production cycles, for example, seedlings being grown to replace those that die after the first planting. These replacement seedlings (at least 10-20 % and as high as 45 %, depending on initial germination and survival) will take up space in the first cycle as well as the second cycle. This means that, over a period of two cycles, nearly half of the seedlings will take up twice as much space as the seedlings that are outplanted first.
Example
Let's calculate the size of a nursery required for the following average annual
production:
- 12,000 plants in 3 x 7 in. (7.5 cm x 17.8 cm) pots
- 18,000 plants in 4 x 7 in. (10 x 17.8 cm) pots
- 500 single-node bamboo cuttings
- 2,000 stump plants, on a trial basis
- The stumps, bamboos, and half of the plants in polypots require from 12 to 24 months in the nursery.
1) 12,000 polypots (3 x 7 in.)
Space is required for 12,000 x 1.25 = 15,000 polypots (to allow for 25% loss and culling). Approximately 200 polypots cover an area of 1 m² when spaced out:
15,000÷200 = 75 m²
Half of these plants require twice as much space, because they are in the nursery for more than 12 months and need to be spaced further apart to avoid crowding.
37.5 m² + (37.5 m² x 2)=112.5 m²
2) 18,000 polypots (4 x 7 in.)
Space is required for 18,000 x 1.25 = 22,500 polypots (to allow for 25% loss and culling). Approximately 115 polypots cover an area of 1 m2 when spaced out:
22,500 ÷ 115 = 196 m²
Half of these plants require twice as much space, because they will be in the nursery for more than 12 months:
98 m² + (98 m² x 2) = 294 m²
3)
500 bamboo cuttings
Space is required for 500 x 1.40 = 700 polypots (to allow for 40% failure in
rooting).
Four cuttings can be planted per square meter:
700÷4 = 175 m²
Twice as much space is required because the cuttings spend more than 12 months in the nursery:
2 x 175 = 350 m²
4) 2,000 stumps
Space is required for 2,000 x 1.25 = 2,500 stumps (to allow for 25% loss and culling). Approximately 100 stumps cover an area of 1 m²:
2,500 ÷100 = 25 m²
Twice as much space is required, because the stumps spend more than 12 months in the nursery:
25 m² x 2 = 50 m²
5) The total area required for the above 4 nursery beds = 806.5 m²
To allow for paths between beds and for terrace risers, this area must be multiplied by a factor of 1.5 for a nursery that is not terraced (slope of up to 2%), and by a factor of 3 for a terraced nursery (slope of 3 - 20%).
A nursery that is not terraced would, therefore, need 1,210 m² for the main plant growing area. A terraced nursery would, therefore, need 2,420 m².
In addition, space will be needed for seed beds, a potting shed, a compost-making area, an office, and parking area. The total area required is likely to be 1,600 –1,700 m², on a level site, and almost twice as much (3,200 – 3,400 m²) on a steep site.
Basic Site Requirements
- Access roads and paths: An all-weather access road to the nursery should be constructed. It should be wide enough to enable vehicles to turn around as necessary. Within the nursery, access paths between beds should be about 60 cm wide for convenient transport, weeding, watering, etc.
- Fencing: Depending on the site, a 1.5 m-high fence should be built to protect the nursery against browsing and trampling animals. Thorny branches and tree poles can be used as temporary fences. Living fences and hedges consisting of trees and bushes are more permanent and offer good protection against wind and animals. They also can reduce invasion of weed seeds into the nursery. If a living fence is planted, tree species that can be easily propagated by cuttings are recommended. Cuttings from these fences can be an important source of planting material.
- Shelter for tools, materials, and workers: A simple hut built out of locally available materials (tree poles, bamboo, palms, mud, etc.) is essential for keeping tools and materials. Depending on the site, a shelter for workers may also be erected.
- Soil dump: Space should be available for storing the soil, sand, compost, or humus required for seedling production. For convenience, these should be close to where they are mixed and the pots filled.
- Seedbeds: Seedbeds, approximately 1 m wide and 2-5 m long, should be
prepared in a well-drained area. There should be a 60 cm-wide path between
them. Ideally, the seedbed should include three layers:
- the bottom layer should consist of 5 cm of gravel, small stones, or bricks, for good drainage;
- the middle layer should consist of 23 cm of humus–rich soil, for holding water;
- the top layer should consist of 2 cm of a 1:1 mixture of sieved sand and humus–rich soil.
Note: Where waterlogging is frequent, raised seedbeds should be used.
- Potbeds: 1 m x 5-10 in potbeds with a 60 cm-wide path between them should be built. Frames made of local materials such as stones, bamboo, tree poles, sawn timber, bricks, rope, or simply earth, should be placed on all sides to keep the pots upright. Normally, potbeds should be level with the ground, but they should be raised above the ground in areas where waterlogging is frequent (Figure 1).
- Shading: To prevent water loss and excessive build-up of heat in seedbeds or containers, shade must be provided. Shade protects germinating seeds and young seedlings. A 50 cm-high shade frame can be erected by using bamboo or wooden sticks. The shades themselves can be made from bamboo slats, crop residues, grasses, leaves, etc., tied together. Some space should be left between the slats to allow light and air to penetrate. The shades should also be removable (Figure 2). Trees should never be planted within a nursery, because full light is required for hardening seedlings before planting.
[figure1]
[figure2]
In addition, a nursery can also have a:
- Windbreak: In areas where there are high prevailing winds, it is recommended to build a windbreak consisting of at least two rows of shrubs and one row of fast-growing trees. These should be placed on the side of the nursery facing the wind. The trees should be far enough from the beds so that their crowns will not shade the beds (Figure 3).
- Compost heap/pit: In high-rainfall areas, compost is prepared in heaps and piles rather than pits because the latter fill up with water. The pile can be 1-1.3 m high, 2 m wide, and 2-4 m long. In drier areas, pits 1-1.5 m deep, I m wide, and 2 m long are dug. In both cases, a shading roof is suggested for protection from the weather.
- Seed-extraction area: An area of about 10 m 2 for drying and extracting seeds should be set aside. This area should be level and receive direct sunlight.
Nursery Design
Before beginning construction, a sketch plan should be drawn which includes:
- fencing
- access paths
- water tanks, if necessary, and a water distribution system
- seedbeds and potbeds
- soil-storage shelter
- working area
- compost heap or pit.
The shape of the nursery should be square or rectangular. An irregular shape means that boundary lines are longer and this increases the amount of fencing. The ideal shape is square since this reduces the distance between seedbeds /potbeds and the area where seedlings are planted.
When the plan is complete, every element should be checked carefully at the nursery site. Farmers should ensure that the location of each component is the best one possible by keeping in mind what it is supposed to do and how this function is connected to other components.
Nursery Construction
Land should be cleared of all vegetation and rocks. Where earthworks such as terraces are necessary, drains should be built early to prevent rain damage. Drains should be built along the top edge and down the sides of the nursery, as well as alongside the paths to prevent the paths themselves from becoming drains.
Strong fences, large enough to keep all animals away, are a good investment. The gate should be simple and easy to open.
When the area for the seedbeds and potbeds has been leveled, the corners and edges can be marked with wooden sticks and strings. Flat stones, wood planks or other barriers can then be set on edge in trenches along these boundary lines to support the beds. The top of the barrier should be 10-12 cm above soil level. The ground around the stones or other material should be compacted so that they don't erode into the beds.
Tools Required
Nursery operators should refer to the following suggested checklist of tools and equipment. In different countries these tools will vary slightly.
- Pickaxe: for breaking up hard and stony ground.
- Hoe: for loosening the soil.
- Shovel: for moving earth, sieving soil, and mixing soil.
- Flat-pronged fork: for loosening soil, lifting bare-rooted seedlings, and turning over compost.
- Rake: for breaking up and levelling the soil.
- Sieve: for sifting soil for the seedbeds and potting, (approximately 1.5 cm mesh wire fitted to a 1 x 1.5 m wooden frame).
- Funnel: for filling pots with soil mixture.
- Scoop: for filling and compacting soil in pots.
- Watering can: for watering seedlings.
- Wheelbarrow: for transporting potting soil, filled pots, tools, seedlings, etc.
- Pruners, knives, shears, or trowels: for pruning the roots that grow out of the pots.
- Machete, or other long knife: for cutting fence posts, removing woody weeds, trimming living fences, etc.
- Germination tray: for germinating small quantities of seed.
- Pointed sticks: for weeding seedbeds and potted stock.
- Tools for pricking: for lifting germinated seedlings into pots (a small shovel, a flat
Seed Handling
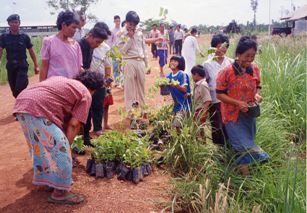
Seed Collection
Seed can be collected locally or obtained from distributors, seed centers, forest services, and research institutes. Successful planting is more likely if the seed is:
- a suitable species
- from an area most closely resembling the planting site
- of good quality
- in sufficient quantity
- available at the right time.
If collection is local, it is important to know where the best trees are located. Seed should come from an area that is as similar as possible (altitude, amount of rainfall, type of soil, etc.) to the area where the seedlings will be grown. Seed should be collected from donor trees with — the desired characteristics (see Module 1).
For construction wood and timber, for instance, straight trees are desirable. For fuelwood production, fast growth and ready coppicing are more important than a straight, unbranched trunk. For fodder, abundant leaf production and good recovery after pruning or browsing are essential features. For fruit, local taste and market patterns are most important.
Remember:
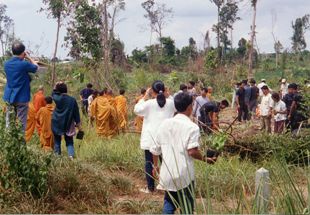
- Seed should be collected from mother trees that are healthy and vigorous.
- Seed should be collected from several trees.
- Seed should not be collected from isolated bushy or very young trees (Figure 4).
It is important to know when to collect seed:
- Collect seeds only from ripe fruits. If fruits are collected too early, the seed might be immature and weak (Figure 5).
- If collection is delayed too long, the seed may be attacked by insects and fungi.
- Pick fleshy fruits just as they turn from green to their ripe color.
Pick dry fruits just before they open. - Do not use unhealthy fruits or those that have already fallen to the ground.
Whenever possible:
- Pick only from branches or small twigs that bear fruits.
- Spread large pieces of cloth on the ground to collect fruits if it is difficult to climb the tree.
When transporting fruits:
- Do not use plastic bags as the fruits will get too warm and mould quickly.
- Store fruits in cloth or jute bags.
- Store the bags in a place that is shaded, cool, and dry.
Calculation of the amount of seed required:
SW = 1.25N/PW
where:
Sw = Seed required in kg or other
unit of measure.
N = number of seedlings required for planting
1.25 = factor that adds a 25 % reserve
p = germination rate (if this is not known, a germination test will be needed.)
W = number of seeds per kg (or other unit of weight)
Since a number of seedlings die after they are outplanted and it is a good idea to select for vigour, it is advisable to increase the estimated number of seedlings by at least 10-20% (the final amount to sow = 1.10 or 1.20 x Sw) depending on the species and local climatic conditions.
Seed extraction and storage
For most species, seeds can be extracted by drying fruits in the sun. Use the following procedure:
- Spread fruits in thin layers on pieces of canvas or trays.
- Stir regularly until cones, pods, or capsules open and release their seeds.
- Remove the pulp of fleshy fruits before drying and separate by winnowing or submerging in water.
- Dry good seeds in the sun. The characteristics of "good" and "bad" seeds depends very much on the species. Generally, discard seeds that are cracked, have been attacked by insects (which is often indicated by small holes in the seed cover), or whose size and colour differ markedly from most of the other seeds.
- Store seeds in a cool, dry, and dark place. Seeds of leguminous species can generally be stored for many years, even at normal temperatures.
- Maintain storage temperature as constant as possible, even if cool storage is not available.
- Make certain that the storage area is well ventilated.
- Store moisture-sensitive seeds in airtight bottles or tins.
- Keep other seed in wooden boxes or cotton sacks.
- Do not use plastic containers unless packing is tight.
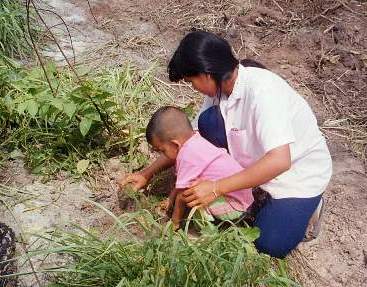
Raising Seedlings in Containers
Seed Pretreatment
Unless they are pretreated, some seeds do not germinate or do so only after a long time. These are usually species with hard seed coats that are impermeable to water and air or prevent the emergence of a radicle, which is the first part to come out of the seed.
Depending on species (see the Species Fact Sheets) the following pretreatments are recommended.
Tap water
Soak seeds in tap water for 12-48 hours before sowing. Only seeds that have absorbed water should be planted. Seeds that have absorbed water look swollen and tend to be larger and softer than seed that do not absorb water.
Boiling water
Place seeds in cloth bags or used cotton socks, then dip in boiling water (5-10 parts water to 1 part seed) and, using a stick stir gor 2015 seconds. More time is needed for seeds with thicker coats (Figure 6).
Figure 6. One way to pretreat seeds is to place them in an old sock or cotton bag and dip them in boiling water for for 3-15 seconds. This is recommended for seeds with a hard coat, such as Acacia auriculiformis, Acacia mangium and Paraserianthes falcataria.
Hot water
Pour hot water that has been boiled and then cooled for 10-15 minutes into a container in which seeds have been placed (10 parts water to 1 part seed). Let stand for 3-10 minutes or until water has cooled to room temperature. Let seeds soak overnight.
Mechanical scarification
Nick off seed coat at the end using a knife, nailclipper or similar sharp instrument. Sandpaper or a file can also be used to roughen the surface of the seed coat, taking care not to injure any internal parts. This technique is practical when seeds are not too small and there aren't to many of them.